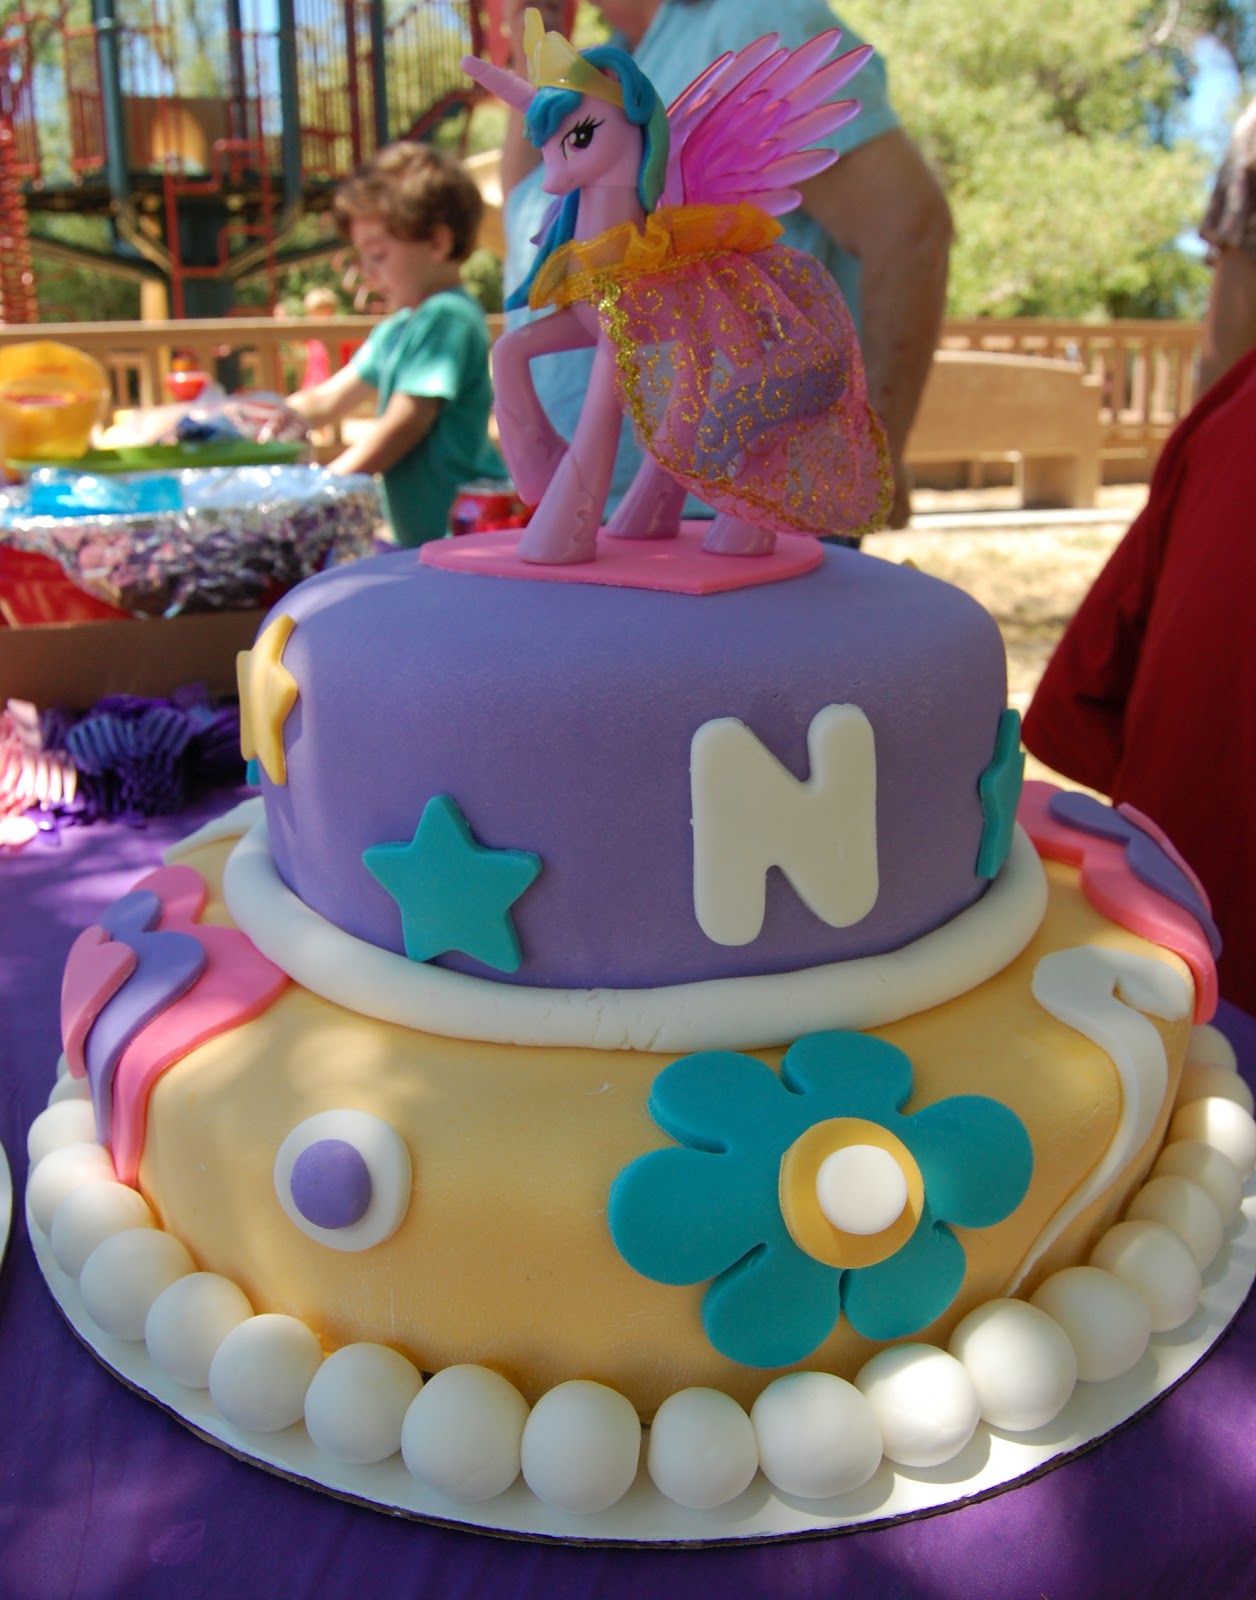
This weekend, we celebrated the birthdays of both of my nieces, Nevaeh who turned 4 and Amara who turned 1.
Amara of course is much too young to pick a theme or design (or really care), so Nevaeh's wish was a My
Little Pony theme. Purple and pink were her requests. I was on it.
Since I only have one child- who happens to be a rough and rowdy 100% boy- I get overly excited when shopping for the girls. Frilly things, glitter, dolls with big eyes, and pastels instead of primary. So naturally, I wanted this cake to be as girly and pretty as possible.
I decided on a 2-tier cake for Vaeh with the bottom tier being a chocolate fudge cake with homemade chocolate buttercream frosting, and the top being half strawberry and half funfetti (again, I wanted girliness galore) with a homemade whipped cream frosting. I used a little cream cheese so it would set and be sturdy enough to hold the fondant. I made a mini cake for Amara, in the same flavors as Vaeh's top tier.
I hope you enjoy it as much as my adorable nieces did! (We took the pictures after arriving at the park so I apologize for the background being busy).
Showing posts with label Cake. Show all posts
Monday, June 11, 2012
Monday, April 23, 2012
Carter's 1st Birthday Cake!
Saturday we celebrated my nephew Carter's first birthday party :D
I asked if I could make the cake. Being a perfectionist, I instantly became nervous that I would not make it to my own or anyone else's standards. But I was excited to take on my first fully decorated 3 tier cake. Carter's theme was "Monkey Boy," and instead of overdoing the monkeys on the cake I went with a simple idea: incorporate banana flavoring.
I started by baking the cakes and home-making the frosting on Wednesday. The bottom tier was a vanilla cake with a banana frosting in the middle. The banana frosting was delicious, but almost more of an icing consistency so I decided to add a thicker chocolate frosting into the banana for the sides and top, to make a sturdier "wall" for the fondant. This was a good idea, and the chocolate banana was so yummy! The top tier and personal cake for Carter (the mini) were both chocolate cake with a rich chocolate frosting.
On Thursday, once the cakes and frosting had chilled overnight in the fridge, I covered them with fondant. I used the Wilton pre-rolled 5lb box of pure white fondant which was enough for all 3 tiers and plenty left over for decoration. I also used the Wilton fondant gel coloring, which saves a lot of money compared to buying already colored fondant.
Friday morning we did detail work. My hubby and I cut out circles using metal icing tips. We used shaped scissors for the border work (not my favorite tool- I wouldn't suggest it because it leaves marks where ever you stop cutting, and made it hard to keep a consistent width throughout the entire border. Go with a tool specifically for fondant!) I used alphabet shaped cookie cutters to cut out CARTER for the front of the cake. Luckily, the detail work was pretty simple so I didn't feel overwhelmed. My only wish was that I had used wooden dowels to hold up the top tier. It started to cave a tad bit (not overly noticeable, but again, I'm a perfectionist) and pulled the fondant.
And, finally, the finished cake. We packed this sucker in ice and it made it from Sacramento to Clearlake, then Clearlake to Santa Rosa. So apparently, it was sturdy. Everyone enjoyed the cake and I received a lot of compliments... now I feel ready to take on another!
I asked if I could make the cake. Being a perfectionist, I instantly became nervous that I would not make it to my own or anyone else's standards. But I was excited to take on my first fully decorated 3 tier cake. Carter's theme was "Monkey Boy," and instead of overdoing the monkeys on the cake I went with a simple idea: incorporate banana flavoring.
I started by baking the cakes and home-making the frosting on Wednesday. The bottom tier was a vanilla cake with a banana frosting in the middle. The banana frosting was delicious, but almost more of an icing consistency so I decided to add a thicker chocolate frosting into the banana for the sides and top, to make a sturdier "wall" for the fondant. This was a good idea, and the chocolate banana was so yummy! The top tier and personal cake for Carter (the mini) were both chocolate cake with a rich chocolate frosting.
On Thursday, once the cakes and frosting had chilled overnight in the fridge, I covered them with fondant. I used the Wilton pre-rolled 5lb box of pure white fondant which was enough for all 3 tiers and plenty left over for decoration. I also used the Wilton fondant gel coloring, which saves a lot of money compared to buying already colored fondant.
Friday morning we did detail work. My hubby and I cut out circles using metal icing tips. We used shaped scissors for the border work (not my favorite tool- I wouldn't suggest it because it leaves marks where ever you stop cutting, and made it hard to keep a consistent width throughout the entire border. Go with a tool specifically for fondant!) I used alphabet shaped cookie cutters to cut out CARTER for the front of the cake. Luckily, the detail work was pretty simple so I didn't feel overwhelmed. My only wish was that I had used wooden dowels to hold up the top tier. It started to cave a tad bit (not overly noticeable, but again, I'm a perfectionist) and pulled the fondant.
And, finally, the finished cake. We packed this sucker in ice and it made it from Sacramento to Clearlake, then Clearlake to Santa Rosa. So apparently, it was sturdy. Everyone enjoyed the cake and I received a lot of compliments... now I feel ready to take on another!
Monday, March 26, 2012
Damn you, popsicle cake!!
From last Tuesday till yesterday night, I had been working on a cake.
Not just any cake, but a popsicle shaped caked that I found in the book "Planet Cake." Being overly ambitious and somewhat arrogant, I decided to skip the "easier" cakes of circles and squares and go straight to the "advanced" shaped cakes. This was my first mistake of many.
Although I have worked with fondant before, and at times with more odd cakes, I had never attempted a shaped cake. Shaped meaning it is not just smooth or flat edges. Shaped meaning ADVANCED. But again, my mind is a dreamer so I felt this would be no problem.
I am posting a series of step-by-step pictures of my popsicle cake, along with what it was supposed to look like. I enlisted the help of my excited toddler and impatient husband. My second mistake.
I did not follow the directions in the book (again, arrogance). I did not do ANYTHING right! Did I mention I had a toddler and impatient husband as my "assistants?" By the end of my week long process to bake 2 cakes, make and set ganache, shape the cake, ganache the cake, color the fondant, roll the fondant, cover the cake, and attempt to add the last detail of the second layer of fondant (the dripping chocolate coating, which I didn't have enough brown coloring for), I was just done with the stupid thing. I realized it was far too advanced, no matter how "easy it looked."
If I had proper tools and had more time to sit down and smooth out the ganache, and work with the fondant a little more, I would've been much happier with the results. But being a perfectionist and detail-oriented, I just wasn't having this lumpy cake. It definitely isn't smooth and crisp like the book's!
CURSES!
The tiny popsicle stick was added for comedic effect :)
Subscribe to:
Posts (Atom)